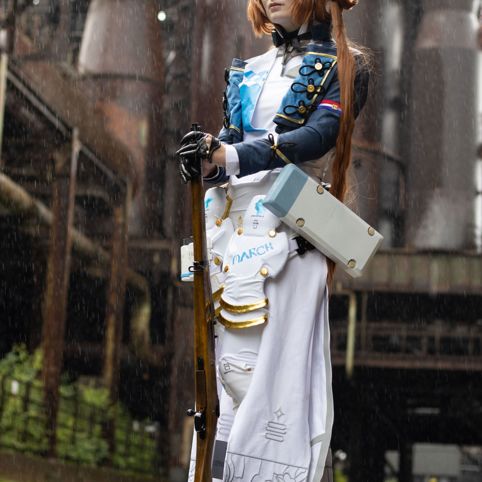
WIP Springfield from Girl´s Frontline 2
In this WIP section, I show my progress while making my Springfield cosplay
Read more … WIP Springfield from Girl´s Frontline 2by WickedShin
Hello and welcome to my tutorial! Today I will show you how to make an El Condor Pasa mask.
It’s a simple mask that doesn’t involve any sewing, and it can be very budget-friendly if you already have leftover materials at home.
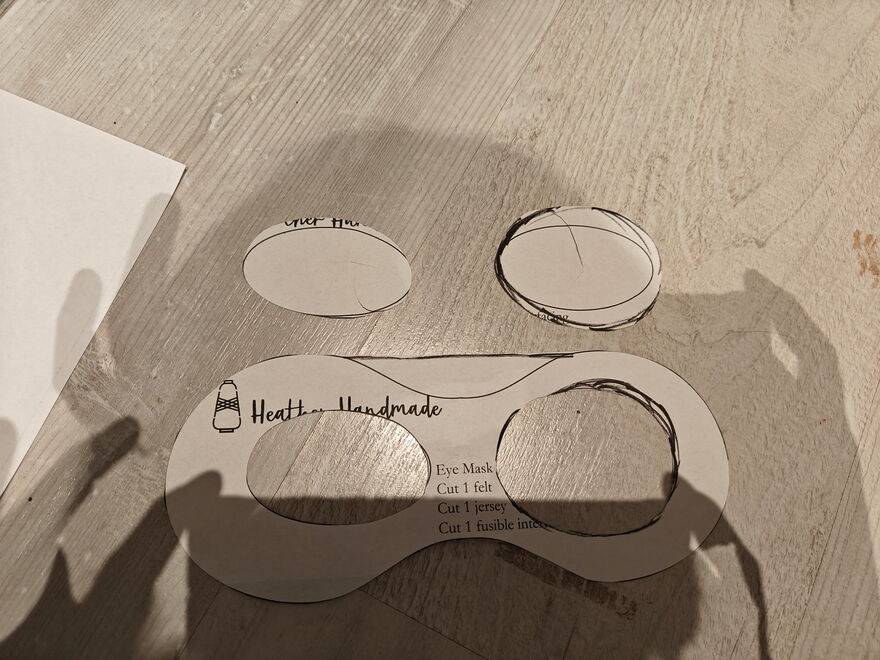
I downloaded an eye mask pattern from Heather Handmade. I adjusted the eye hole size and slightly changed the overall shape to better match Condor’s mask.
I cut one eye hole much larger on one side to test whether I preferred that look over the slimmer version. After holding it against my face and checking that I was happy with the size and shape, I moved on to the next step.
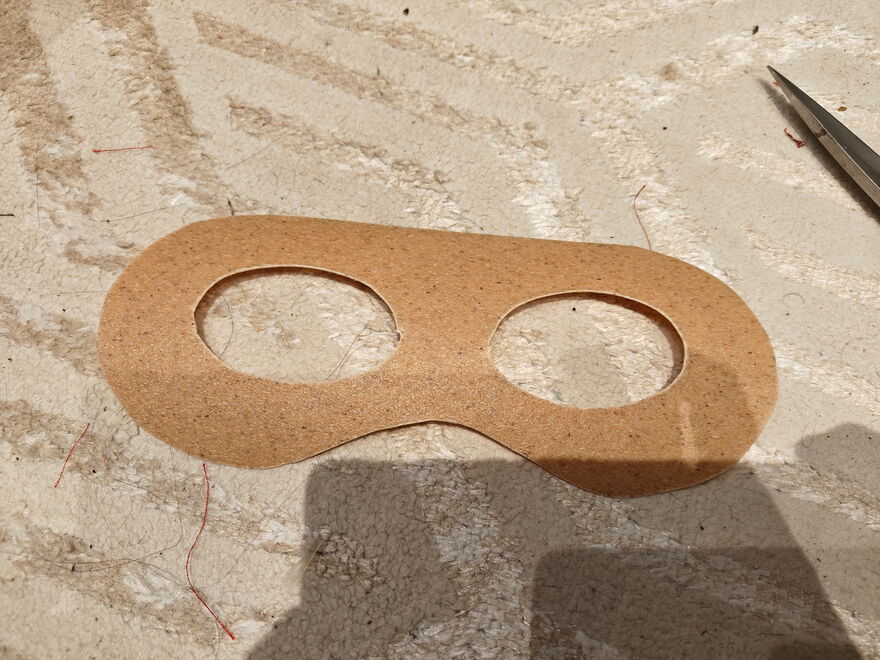
I transferred my pattern onto a sheet of Worbla (I chose the smaller eye holes for the final version).
After tracing the pattern, I cut it out. I used a single sheet of Worbla for this mask.
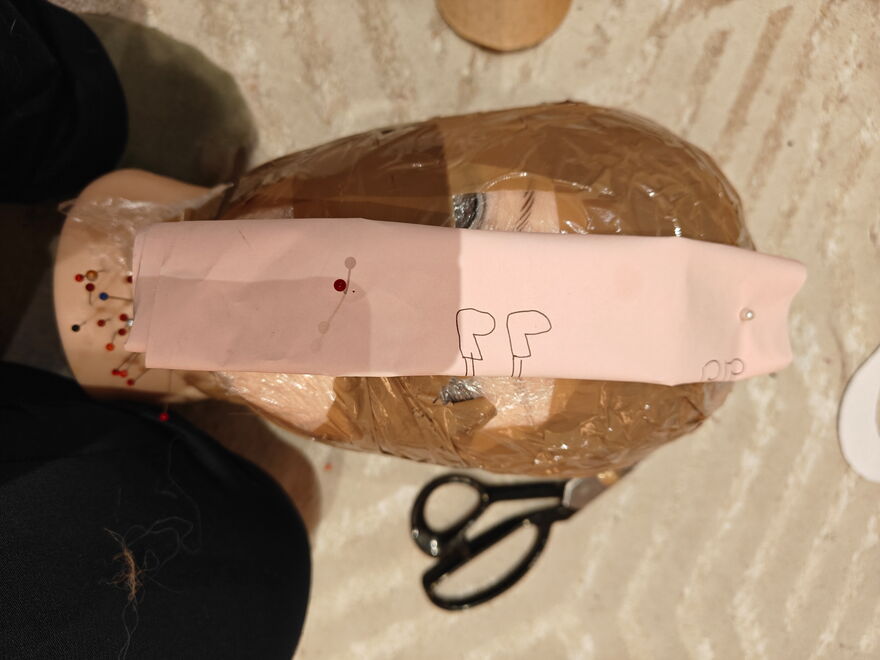
Since the mask was still flat and didn’t match the shape of my head, I used a mannequin head. I pinned a piece of paper along the nose area because my mannequin’s nose was very small and I have a deeper nose bridge.
I slowly heated the Worbla and pressed it onto the mannequin until it had a rough shape that I liked.
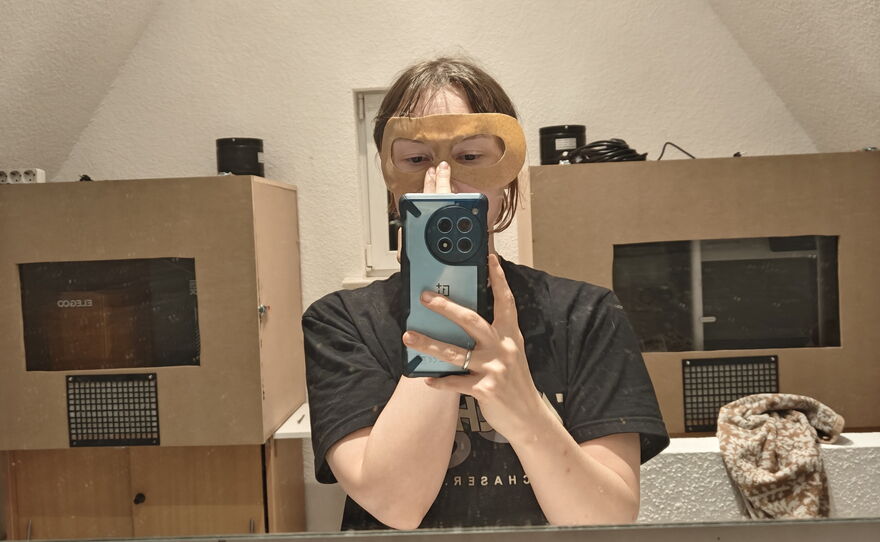
After shaping it on the mannequin, I tried the mask on my face to see what needed adjusting and where it should sit closer to my skin. I heated the areas I didn’t like using a hairdryer. (In the picture you can see areas standing away from my face — those are the parts I warmed up.)
After heating, I carefully checked if the Worbla was still too hot. If it was, I waited until it was warm but safe to touch. Then I put the mask on and gently bent the areas that needed fixing.
Please be careful:
I repeated Steps 3 and 4 multiple times until the mask fit my face properly.
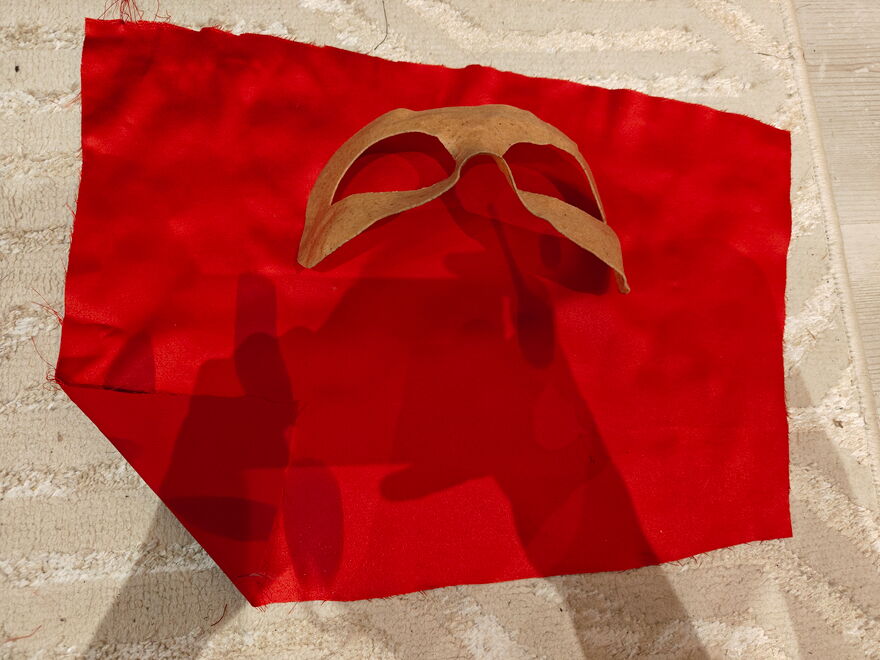
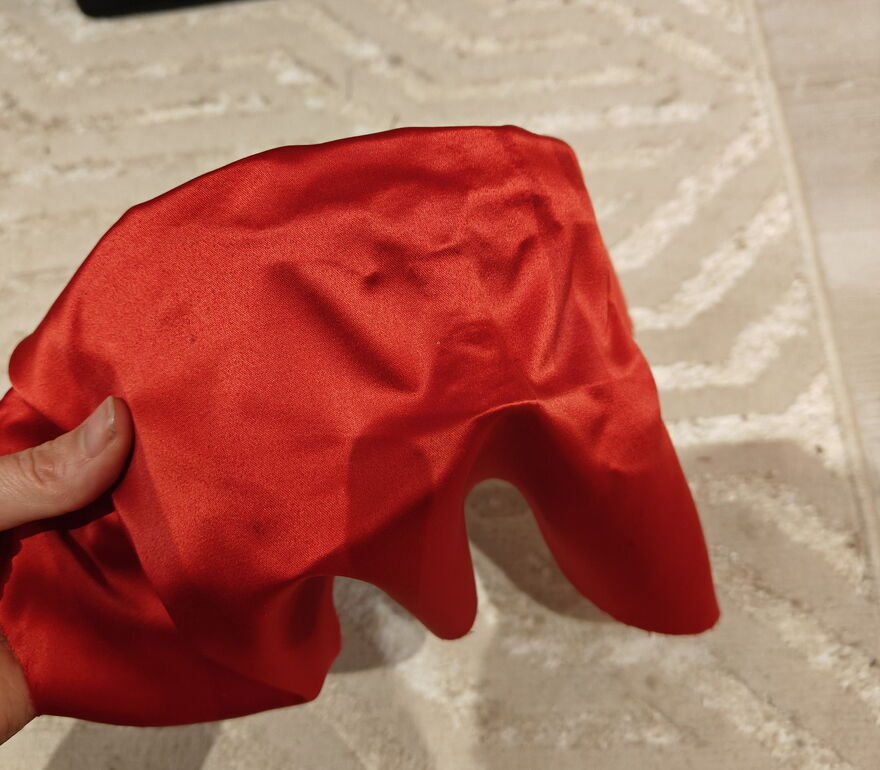
Choose a fabric of your choice. I used a red satin-like fabric.
Tips:
Now it’s time to attach the fabric to the Worbla. I used normal craft glue (UHU).
I covered the entire mask with a thin layer of glue, carefully laid the fabric on top, and pressed it down starting from the nose and moving outward to avoid wrinkles.
After it dried, I cut a cross shape into the fabric inside the eye holes so I could fold the fabric inward and glue it to the back side. I left extra fabric for adjustment if needed.
After securing it with clips and letting it dry again, I trimmed away the leftover fabric.
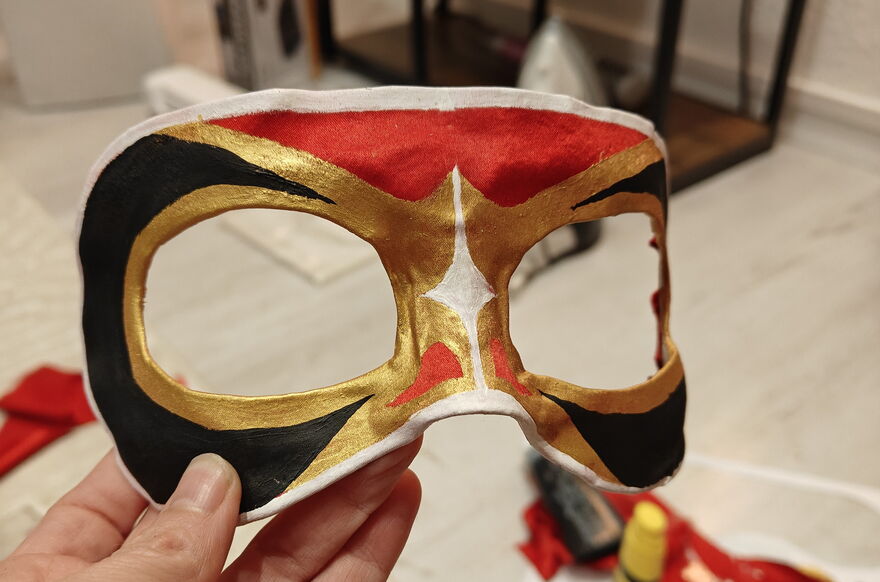
Once everything is dry, the mask is ready to be painted. I used normal acrylic paint.
I had to apply multiple layers of white paint so the red fabric wouldn’t show through — this is why I recommend using white fabric if possible. Finally, I glued ribbons to the sides so I could tie the mask to my head.
And now you’re ready to be El Condor Pasa!
In this WIP section, I show my progress while making my Springfield cosplay
Read more … WIP Springfield from Girl´s Frontline 2
In this guide I will show you how you can make an El Condor Pasa mask from Uma Musume.
Read more … How to make an El Condor Pasa Mask from Uma Musume
Comments
Comment by DenizGelion |
wowwwwwwwwwwwwwwwww sugoiiiiiiiiiiiiiiiiiiiiiiiiiiiiiiiiiiiiii god DAMN GIRL
Add a comment